How To Easily Create File Upload Form In WordPress With weForms weDevs
1.19M subscribers 289 29K views 1 year ago Learn WordPress Are you looking to boost traffic to your WordPress website? Learn how to register your website with Google Search Console in this.

How to Upload HTML Verification File to Shopify Xirosoft
In this video, we will learn how to upload HTML file to WordPress website. By following this method you can upload HTML verification file to your WordPress w.
How to Upload HTML Verification File to WordPress Xirosoft
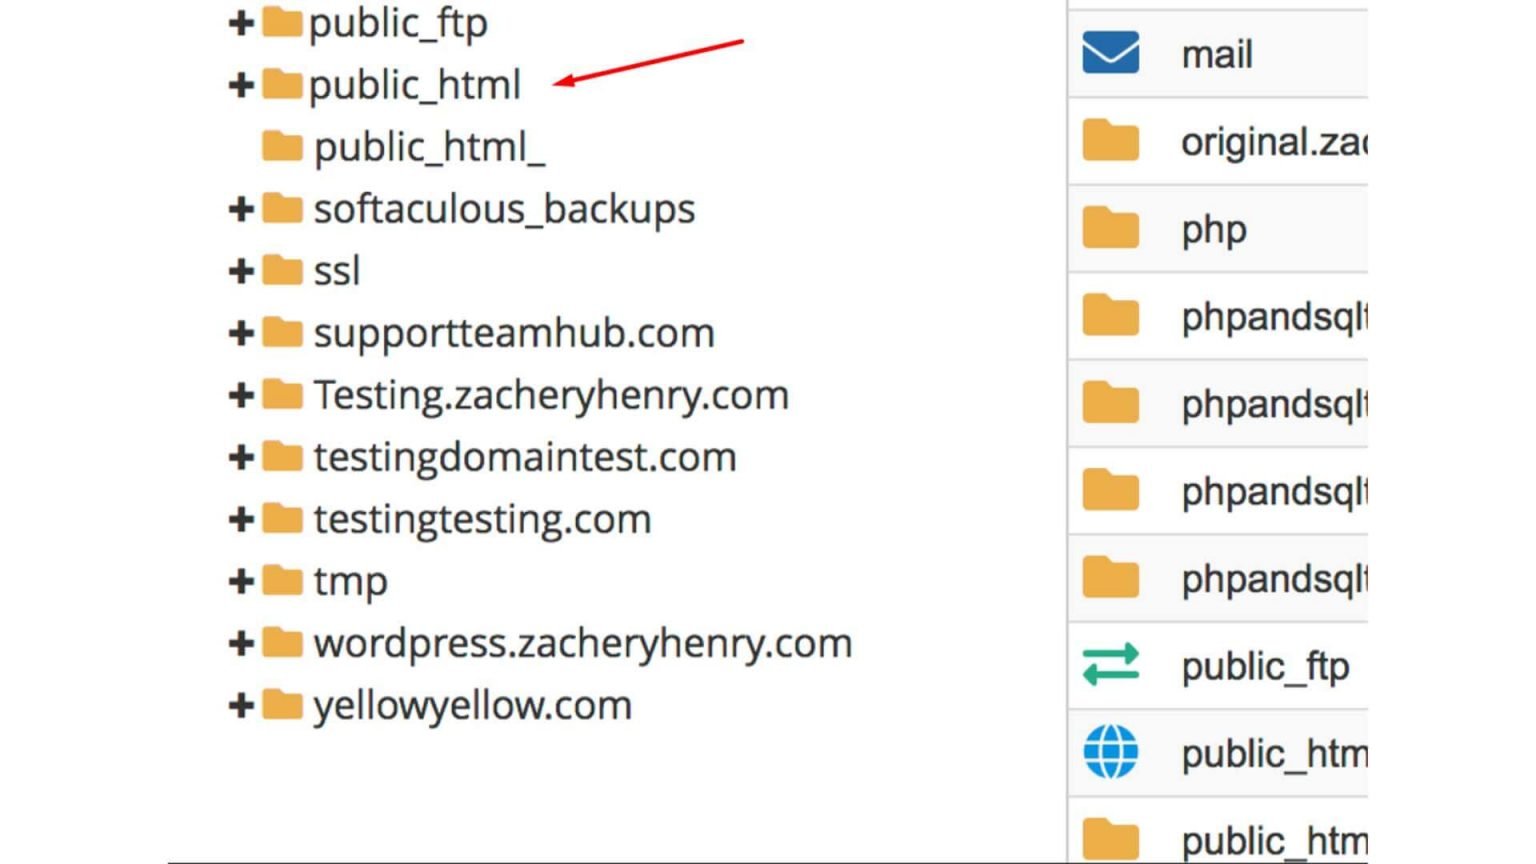
Method 1: File manager in hosting control panel. Log in to your hosting account's control panel (e.g., cPanel, Plesk). Look for the "File Manager" or a similar file management tool. Navigate to the root directory of your WordPress installation. Locate and open the "wp-content" folder.
How to Upload HTML Verification File to WordPress Xirosoft
Google will give you a unique HTML tag if you choose HTML tag verification. You need to add this tag to your WordPress site's header. Click on the "Appearance" tab on your WordPress homepage. After that, click "Theme Editor.". Discover the "header.php" file; it has the code for the top part of your website.

How to Upload HTML Verification File to WordPress Xirosoft
You can simply convert your existing HTML page into WordPress by uploading the file to it. You also need to upload the file for a few reasons that are as follows. To Verify Google Search Console Having verification by the Google Search console is another basic need for any site. You must be aware of its importance.

Verification photo Scrolller
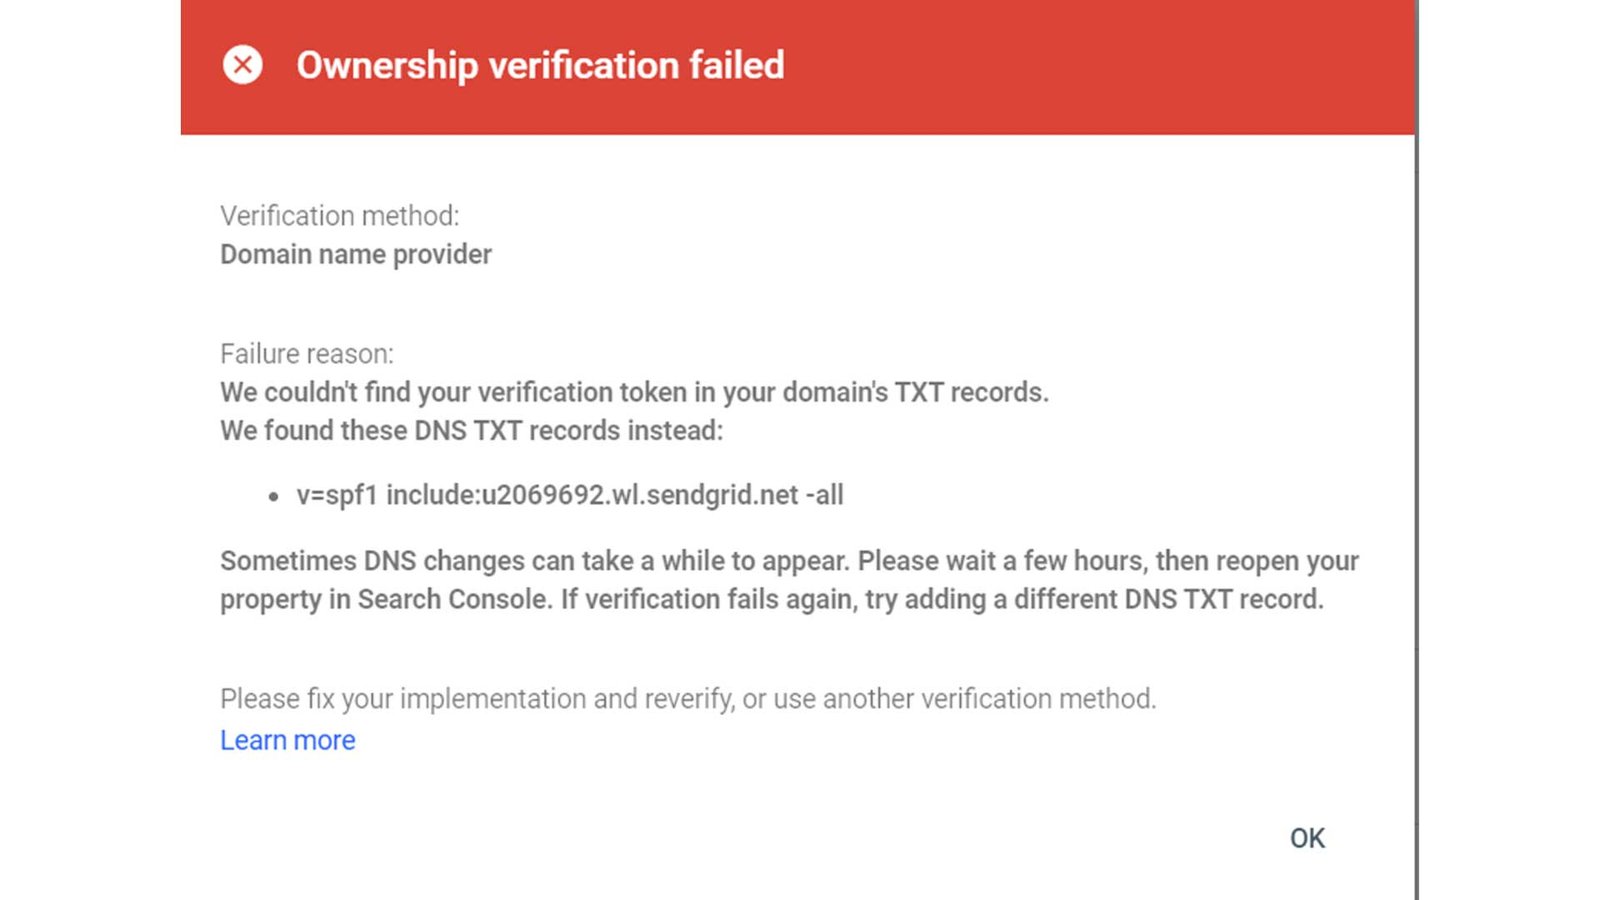
First, you need to visit the Google Search Console website and click on the 'Start Now' button. Next, you'll need to sign in with your Google / Gmail account. Once logged in, you'll be asked to enter your website URL. There are two methods for site verification: domain name or URL prefix.

How to Upload a Google HTML Verification File to WordPress We Design
The first step is to generate an HTML verification file for our website: Head over to the Google Search Console and select Start now. When prompted, enter the username and password for your Gmail account. At this point, you can verify your website using either its domain name or URL prefix.
How to Upload HTML Verification File to WordPress Xirosoft
To generate the HTML verification file, go to the Google search console and add your website. Once you have done this, select the HTML verification method. Google will provide you with a meta tag. Copy the content of the meta tag and paste it into a text editor. Save this file as an HTML file. Upload the HTML verification file to your WordPress.
How to upload verification documents to verified
To upload a HTML verification file to your WordPress site, follow these steps: 1. Go to your WordPress site's admin area. 2. Click the "Settings" link in the top left corner of the admin area. 3. In the "Settings" area, click the "Verification" tab. 4. Under "HTML verification file," click the "Upload" link. 5.

How to Upload HTML Verification File to WordPress Xirosoft
Initiating the Process: Setting Up a Google Search Console Profile Website Verification: Downloading the HTML Verification File Navigating to Your WordPress Admin Panel Key Tips for Dashboard Navigation: Enhancing WordPress with a File Manager Plugin Installing a File Manager Plugin: Additional Insights: Navigating to the File Manager in WordPress

Verifying Webmaster Tools & Google Apps Web Hosting Hub
Step 1: Log in to your WordPress Dashboard. Step 2: Click on the Appearance tab in the left-hand menu. Step 3: Click on the Editor link in the sub-menu. Step 4: Look for the Header file in the right-hand menu and click on it. Step 5: Copy and paste the HTML verification code into the top of the Header file, and then save your changes.

The 2 Best Ways to Upload HTML Verification File
One of the easiest ways to verify your WordPress website is by uploading a file to your server. You can do this with a File Transfer Protocol (FTP) client or via cPanel's File Manager tool if your host uses cPanel. Here's how to do it: First, you'll need to navigate to Google Search Console.

Top 13 how to upload google html verification file wordpress mới nhất
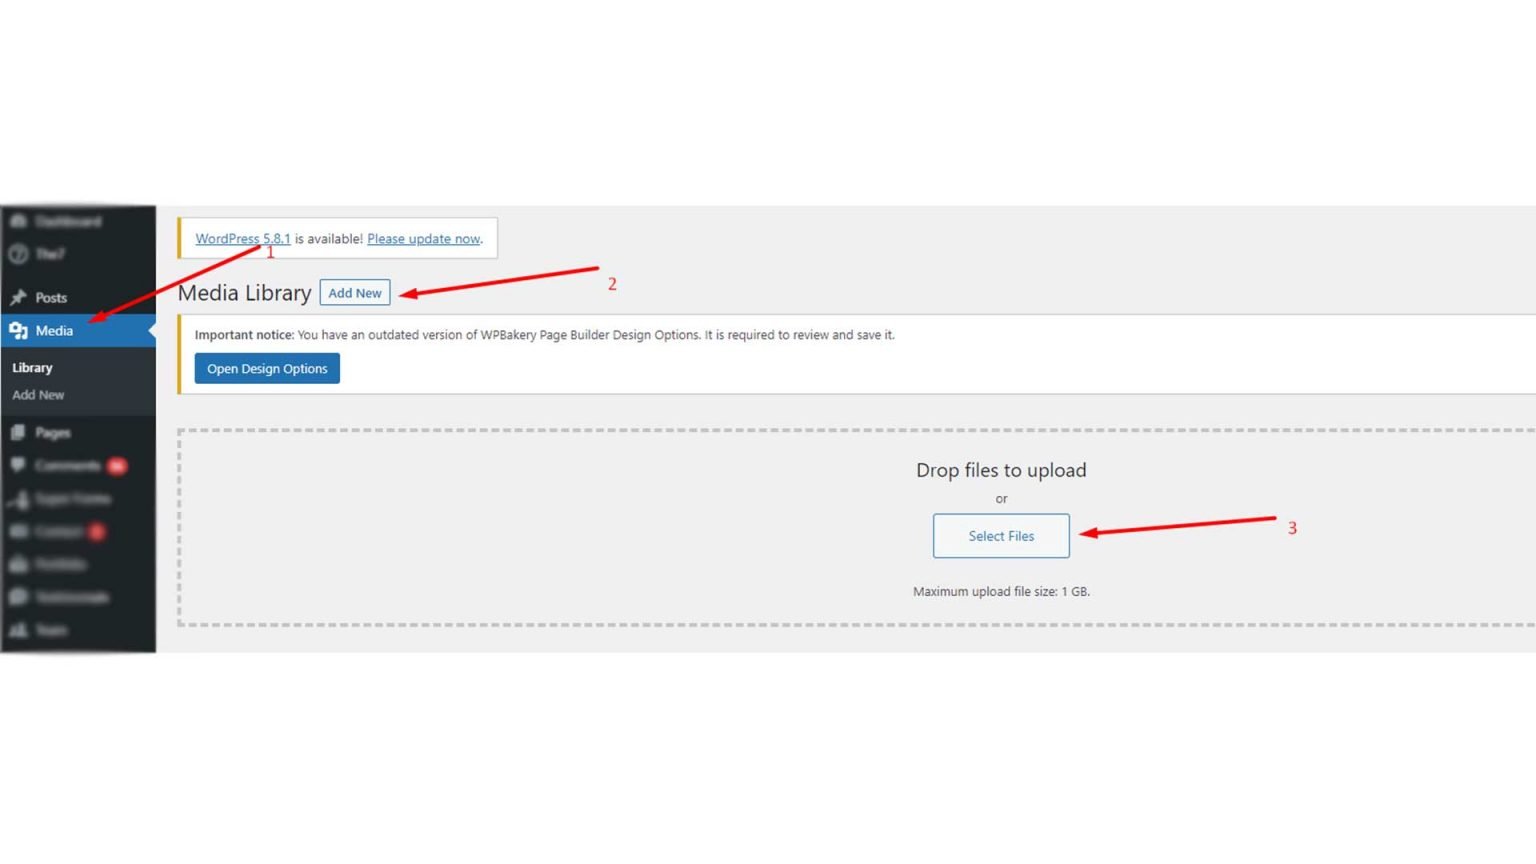
Uploading files to WordPress is kind of a necessity. Well, you probably could get by without ever uploading a file, but it would make for a pretty boring site! If you want to add images, videos, PDFs, or other types of media, you need to know how to upload them to your WordPress site. Fortunately, it's not too difficult.

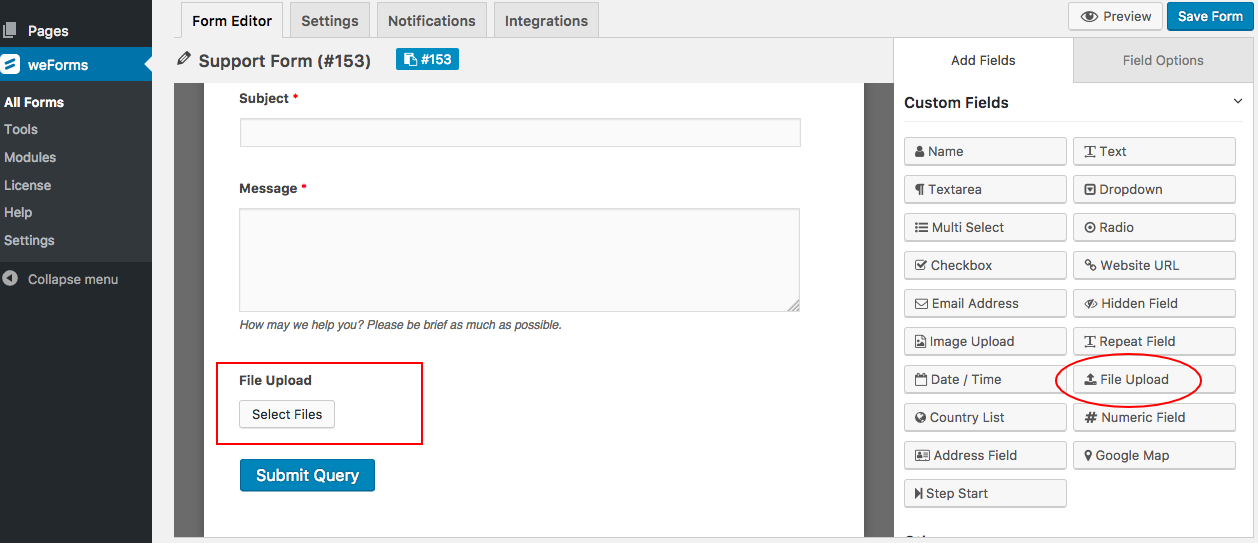
How to Create a File Upload Form in WordPress (Step by Step)
The first step is to generate an HTML verification file for our website: Head over to the Google Search Console and select Start now. When prompted, enter the username and password for your Gmail account. At this point, you can verify your website using either its domain name or URL prefix.
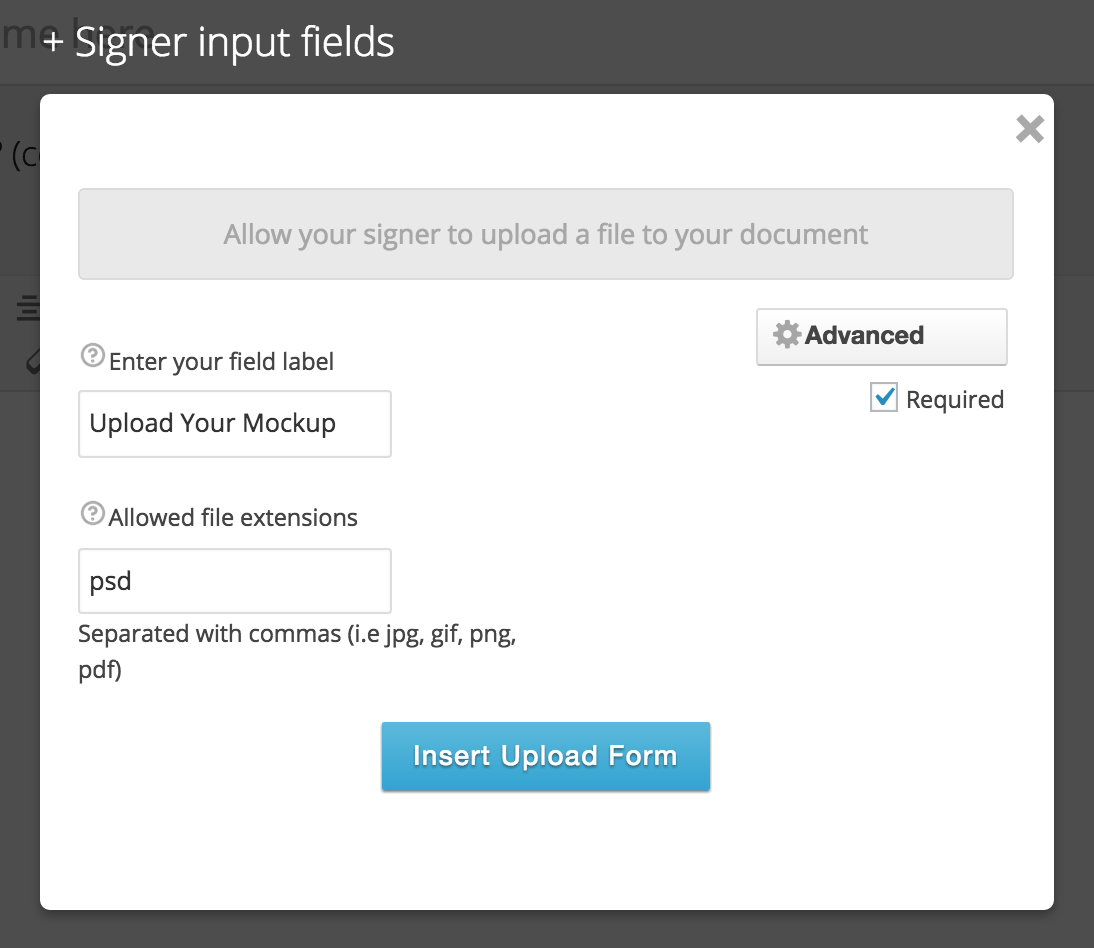
WordPress File Upload added WPESignature Custom Fields
Let's get started! What Is Google Search Console? Google Search Console (formerly known as Google Webmaster Tools) is a free service that enables you to track your website's presence on Search Engine Results Pages (SERPs). You can use it to quickly submit new content, and to track the progress of your existing content.
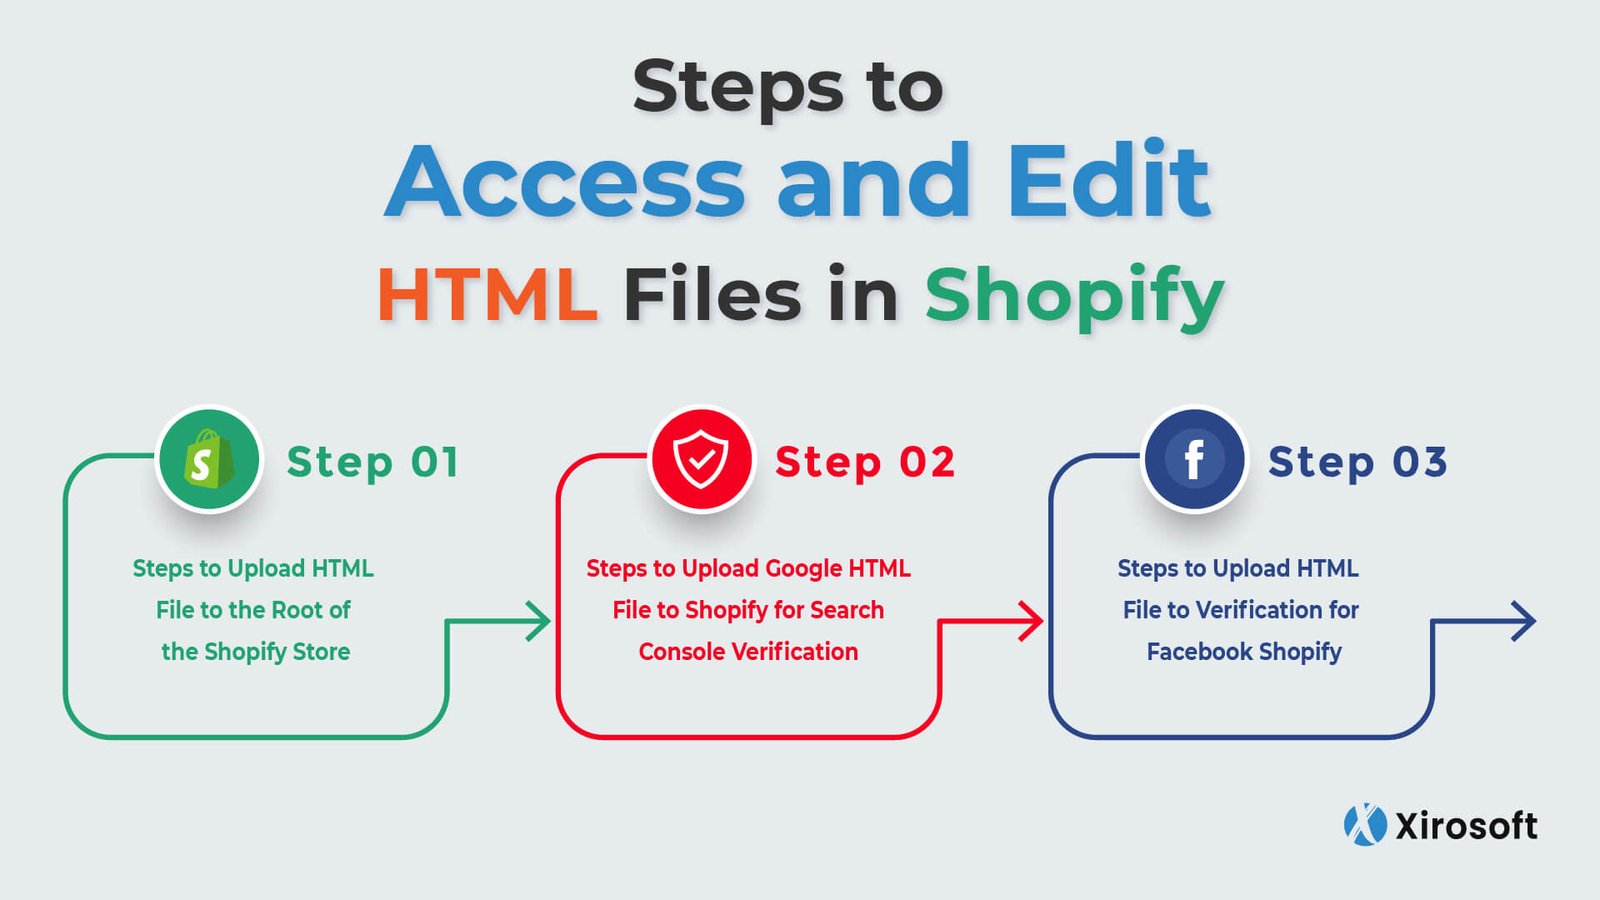
How to Upload HTML Verification File to Shopify Xirosoft
First, log into your hosting account's cPanel and choose the File Manager tool. Now, you have 2 options: Upload the HTML file directly to your root folder. Create a new folder and upload the HTML file to it. With the first technique, you have to unzip the HTML file where you have it saved.